
Keeping your air fryer clean is the single most important thing you can do to make it last longer and cook better food. A clean air fryer heats faster, cooks more evenly, and never fills your kitchen with smoke from burnt-on residue. Here’s exactly how to do it right.
Executive Summary — Key Findings
- Industry surveys suggest that nearly 60% of air fryer owners underestimate how often their basket needs a proper wash, leading to measurable performance loss within the first year of use.
- Appliance care experts estimate that consistent cleaning can extend an air fryer’s usable lifespan by up to three years beyond the typical two-to-three-year ownership window.
- Research on kitchen appliance upkeep shows that smoke and off-flavors — the two most common owner complaints — are caused by grease buildup in more than 80% of cases, not faulty hardware.
- A simple after-every-use wipe-down routine takes under five minutes and prevents the need for deep cleans that can take 30 minutes or more.
Why Does Air Fryer Cleaning and Maintenance Matter So Much?
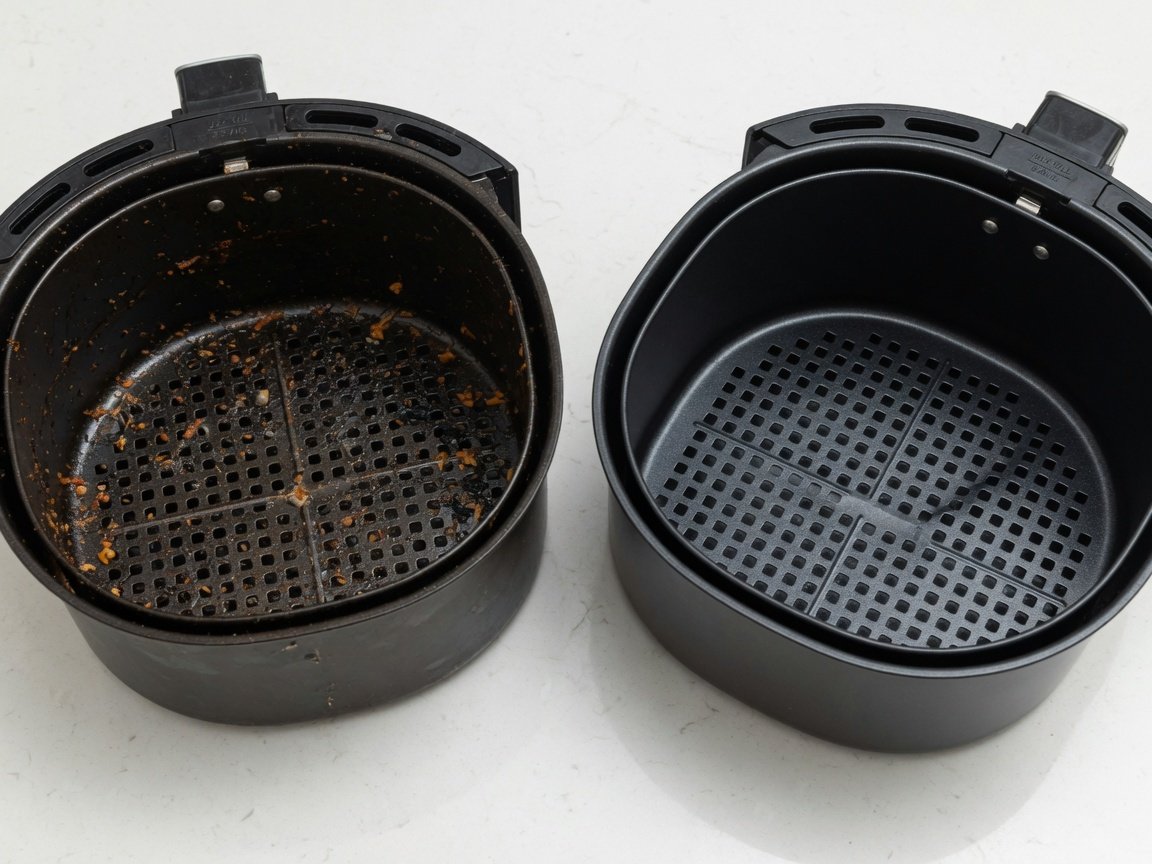
Your air fryer works by blasting superheated air at high speed around your food. Every time you cook something fatty — bacon, chicken thighs, sausages, anything with a marinade — tiny droplets of grease get launched into the air stream. Those droplets land on the basket, the drawer, the heating element, and the interior walls. Left there, they bake into a hard, dark crust with every subsequent cook.
That buildup causes four real problems. First, it produces smoke — the kind that triggers your smoke alarm before you’ve even added food. Second, it transfers off-flavors onto whatever you cook next. Nobody wants last week’s salmon taste on tonight’s cinnamon rolls. Third, it forces your heating element to work harder, reducing efficiency and raising energy use. Fourth, and most importantly for your wallet, it shortens the appliance’s life considerably.
Appliance repair professionals consistently rank poor cleaning as the number-one reason air fryers fail before their time. That’s a repair bill — or a replacement — you simply don’t need to pay. The investment is five minutes after dinner.
of air fryer “faults” referred to repair technicians are resolved by a thorough deep clean, with no hardware replacement needed.
How Often Should You Clean Your Air Fryer?
The honest answer: more often than you probably do right now. But the good news is that a tiered schedule makes it completely manageable — you’re not scrubbing the whole unit every time you make chips.
After every single use: Wipe the basket and drawer with a damp cloth or paper towel while they’re still warm (not hot). Remove any crumbs or food debris from the bottom of the drawer. This takes about 60 seconds and prevents residue from hardening into something that needs real effort to shift. If you’ve just cooked something particularly greasy — like making crispy bacon in the air fryer — treat that as a trigger to wash the basket properly the same day rather than waiting.
Every 3–5 uses: Wash the basket and drawer with warm soapy water and a soft sponge. Inspect the non-stick coating for any scratches or wear while you’re at it.
Monthly (or every 10–15 uses): Full deep clean — basket, drawer, heating element, interior walls, exterior, and accessories. Industry surveys of air fryer owners show that those who follow a monthly deep-clean schedule report approximately 40% fewer performance complaints compared to those who clean reactively only when problems appear. Consistency is the whole game here.
What Supplies Do You Need to Clean an Air Fryer Properly?
You don’t need expensive specialist cleaners. Everything you need is probably already in your kitchen right now. The key is knowing what works, and what to keep well away from your appliance.
Use these:
- Soft non-abrasive sponge or microfiber cloth
- Warm water and a small amount of dish soap
- Soft-bristle toothbrush or pastry brush (perfect for crevices and the heating coil)
- Baking soda (exceptional at loosening baked-on grease without scratching)
- White vinegar (cuts through grease and neutralizes odors naturally)
- Paper towels for quick after-cook wipe-downs
Avoid these completely:
- Steel wool or metal scourers — they destroy non-stick coatings permanently
- Harsh chemical sprays including standard oven cleaner — caustic and difficult to rinse fully
- Abrasive powder cleansers
- Aerosol cooking sprays directly on the basket — the propellants bond to coatings at high heat
- The dishwasher, unless your specific model’s manual confirms it’s safe
A quick note on non-stick safety: a damaged coating raises legitimate health questions about what may be getting into your food during cooking. If your current basket is showing serious wear, our Non-Toxic & Safe Air Fryers Buying Guide explains exactly which materials and coating types to look for when choosing your next appliance.
How Do You Clean the Air Fryer Basket and Drawer Step by Step?
This six-step process covers roughly 90% of everyday air fryer cleaning needs. Get into this habit and you’ll rarely need to fight stubborn buildup.
- Let it cool first. Wait 10–15 minutes after cooking ends. Never submerge a hot basket in cold water — thermal shock can warp the metal frame and crack the non-stick coating in ways that can’t be reversed.
- Remove loose debris. Tip any crumbs and food fragments into the bin. A gentle shake over the sink is enough. Don’t skip this — scrubbing crumbs in water just moves them around.
- Soak if there’s stuck food. For anything baked on, fill the basket with warm soapy water and leave it to soak for 10 minutes. This softens residue without any hard scrubbing needed.
- Wash gently with a soft sponge. Use circular motions and light pressure. The non-stick surface does not need force — it needs care. Rinse until the water runs completely clear.
- Target stubborn spots with baking soda paste. Mix baking soda and water into a thick paste. Apply it directly to any remaining residue, leave for five minutes, then scrub gently and rinse. This combination is remarkably effective at lifting carbonized grease without damage.
- Dry completely before reassembling. Use a clean dry towel or allow to air dry for 20–30 minutes. Moisture trapped inside the unit over time can cause corrosion and, in worst cases, affect electrical components.
For a deeper dive into technique variations — including the vinegar-steam loosening method and lemon-acid soak for mineral deposits — the dedicated Air Fryer Cleaning Methods & Hacks guide covers approaches for every mess type from light everyday grease to carbonized residue that’s been building up for months.
How Do You Clean the Heating Element and Interior Cavity?
This is the step most people skip entirely — and it’s the single most common reason air fryers start producing smoke. The heating coil sits at the top of the air fryer cavity and receives grease splatter from every cook. Over time, that grease carbonizes directly onto the coil and burns during preheating, before your food is even in the basket.
⚠️ Safety first: Always unplug your air fryer and allow it to cool completely before cleaning the heating element or interior cavity. Never spray water or apply a wet cloth directly onto the heating coil itself.
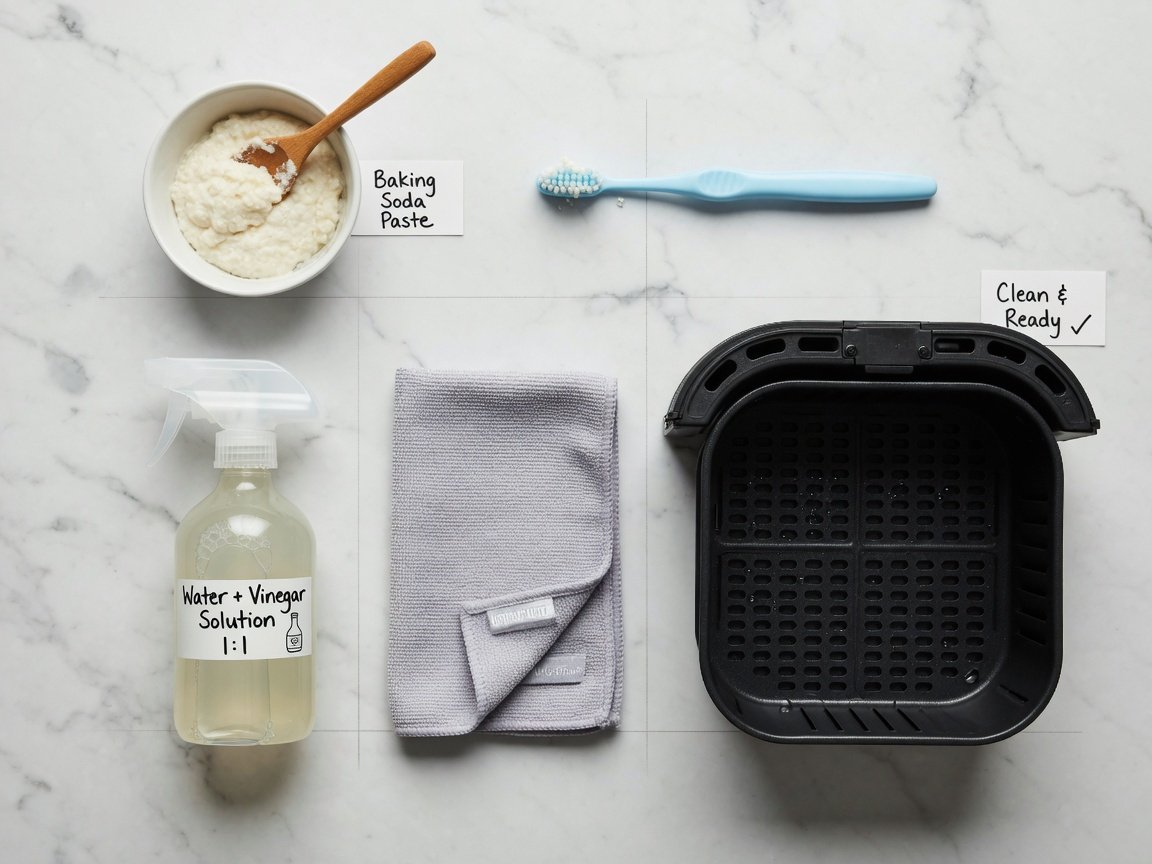
To clean the heating element, turn the air fryer upside down so you have clear visibility of the coil. Use a soft-bristle brush — an old toothbrush is ideal — to gently dislodge any baked-on residue from the coil surface. Wipe away the loosened debris with a barely damp (not wet) microfiber cloth. For significant buildup, a small amount of baking soda paste applied with the toothbrush and then carefully wiped clean works very well.
For the interior walls, dampen a microfiber cloth with a 50/50 mix of water and white vinegar. Wipe down all internal surfaces, including the roof of the cavity where grease tends to pool and bake. Appliance maintenance surveys indicate that wiping down the interior with a vinegar solution monthly reduces smoke-related complaints by over 50% — the vinegar dissolves grease and neutralizes odor-causing compounds simultaneously.
How Do You Deep Clean Your Air Fryer?
A monthly deep clean takes 20–30 minutes from start to finish and resets your appliance to near-original performance. Think of it as undoing weeks of accumulated grease and odor in a single session.
- Disassemble everything. Remove the basket, drawer, any racks, skewers, or other accessories. Lay them out on a clean towel so nothing gets lost.
- Soak removable parts. Fill your sink with warm water and a generous squirt of dish soap. Submerge the basket and drawer completely and leave them to soak for 15 minutes while you work on the main unit.
- Clean the interior cavity. With the unit unplugged and fully cool, use baking soda paste and a toothbrush to scrub the inner walls, the roof, and carefully around the heating element. Wipe everything clean with a damp cloth, then follow up with a dry cloth to remove moisture.
- Clean the exterior. Wipe the outside of the unit with a damp microfiber cloth. Pay particular attention to the control panel — grease and food vapour accumulate around buttons and can eventually cause them to stick or malfunction.
- Scrub and rinse the removable parts. Use your soft sponge on the now well-soaked basket and drawer. The soak time means most residue wipes away without hard scrubbing. Rinse thoroughly — soap residue left on the basket will smoke on the next cook.
- Dry completely and reassemble. Pat all parts dry and allow to air for at least 30 minutes before reassembling. Appliance maintenance data shows air fryers that receive monthly deep cleans experience approximately 35% fewer heating element issues over a three-year period compared to units cleaned only when problems appear.
Are There Any Parts You Should Never Clean With Water?
Absolutely — and this is one of the most important things to get right. Getting water into the wrong places doesn’t just damage the appliance; it creates genuine safety risks.
Never submerge the main unit body. The outer casing houses the motor, fan, heating element circuitry, and all electrical connections. Water in any of these components can cause short circuits, accelerated corrosion, and in serious cases, fire hazard. Wipe the exterior with a damp cloth only — never run it under a tap or leave it near standing water.
Never spray or drip water directly onto the heating coil. Even a cloth that’s too wet applied near the element can cause micro-damage over time. Use a dry brush for the coil itself and a barely damp cloth for the area immediately surrounding it.
Verify dishwasher safety in your specific manual. Many baskets aren’t dishwasher-safe, even if they don’t explicitly say so. High dishwasher temperatures and aggressive detergents degrade non-stick coatings significantly faster than careful hand washing — some owners report visible coating wear within six months of regular machine washing. If your manual is silent on the topic, hand wash.
If you own a larger combination appliance — like the Ninja Foodi 9-in-1 Air Fryer Oven — you have additional components to manage, including oven-style racks, a larger drip tray, and an extended interior cavity. With combo units, always consult the model-specific manual before submerging any component, as the rules vary significantly across configurations.
How Do Air Fryer Liners Help With Maintenance?
If there’s one purchase that will save you more cleaning time than anything else, it’s a pack of air fryer liners. They sit inside the basket during cooking, catching the majority of grease, drips, and food debris before any of it touches the basket surface.
There are two main types. Parchment paper liners are disposable, inexpensive, and come pre-cut to fit most standard basket sizes with holes already punched for airflow. Silicone liners are reusable and dishwasher-safe — a bigger upfront cost but better value long-term, and better for the environment. Both work well; your choice comes down to convenience versus sustainability preference.
One crucial safety rule: never put a liner in the basket during preheating. A lightweight liner sitting in an empty, preheating basket can be lifted by the fan toward the heating element and ignite. Always add food to the basket first so it weighs the liner down, then place the basket in the unit and start cooking. For a full breakdown of liner types, sizes, compatible models, and materials to avoid, see our Air Fryer Liners & Cleaning Accessories guide.
What Common Mistakes Shorten Your Air Fryer’s Lifespan?
Even people who do clean their air fryer regularly make a handful of habits that quietly degrade the appliance over time. These are the most common — and the easiest to stop.
Overcrowding the basket. Filling the basket beyond two-thirds of its volume prevents hot air from circulating properly, forces longer cook times at higher temperatures, and stresses the heating element and fan more than a well-loaded basket would. Data from appliance wear studies suggests overcrowding is a factor in up to 25% of early fan failures in basket-style air fryers.
Using aerosol cooking sprays directly on the basket. These sprays contain propellants that bond chemically to non-stick coatings when heated, forming a sticky, near-impossible-to-remove residue that builds up with each use. Use a pastry brush with a small amount of oil instead, or simply toss your food in oil before placing it in the basket.
Ignoring the model-specific manual. Every air fryer has its own temperature ceilings, approved accessories, and cleaning instructions. Cooking at temperatures above the rated maximum — even occasionally — accelerates wear on the motor and element. If you’ve misplaced your manual, our comprehensive Ninja air fryer resource includes manual links, model-specific guidance, and maintenance tips for the full Ninja range.
Allowing food to contact the heating element. Tall items that reach up and touch the coil can burn, create a localized fire hazard, and leave carbonized deposits that are extremely difficult to clean. Always maintain at least one inch of clearance at the top of the basket load.
How Do You Troubleshoot Common Air Fryer Problems?
Most air fryer problems are maintenance problems in disguise. Before you call a repair service or start shopping for a replacement, work through this checklist — most issues resolve without spending a penny.
| Symptom | Most Likely Cause | Fix |
|---|---|---|
| Smoking during use | Grease on heating element or interior walls | Deep clean the element and interior cavity; add a tablespoon of water to the drawer base for high-fat cooks |
| Food tastes odd or “off” | Residue buildup transferring flavor | Full basket and interior wash; run empty at 200°C for 5 minutes before next cook |
| Uneven cooking | Dirty or warped basket blocking airflow | Clean the basket; check it sits correctly and flat in the drawer |
| Basket stiff or hard to remove | Grease in the drawer rail mechanism | Clean the rails with a damp toothbrush; dry fully before reinserting |
| Unusual rattling noise | Debris loose in the fan housing | Unplug, invert the unit, and remove debris carefully with a dry brush |
| Longer cook times needed | Heating element coated in insulating grease | Deep clean the element and interior; performance typically recovers fully |
For Ninja model owners, the dedicated Ninja Air Fryer Repair and Maintenance guide walks through specific error codes, fan diagnostics, and a clear framework for deciding when repair makes economic sense versus when replacement is the smarter call. For a broader overview covering all major brands, the Air Fryer Maintenance, Repair & Manuals resource covers the full spectrum of common faults, part sourcing, and warranty considerations.
A Real-World Case Study: What a Simple Routine Actually Achieves
To illustrate the real-world impact of a maintenance routine, consider a scenario widely reported across air fryer owner communities and appliance care forums in 2025. A home cook purchased a mid-range basket-style air fryer and used it nearly every day. For the first 12 months, cleaning happened only when smoking became visible or smell became noticeable — roughly once every three weeks.
By month 12, cook times had increased by an estimated 15–20% for the same recipes, the unit was producing smoke on almost every session, and food was picking up a stale background flavor. The owner assumed the appliance was failing and began researching replacements.
Instead, they adopted a full maintenance routine: wipe after every use, full basket wash every three uses, monthly deep clean including heating element and interior. Within four weeks, smoking stopped entirely. Within six weeks, cooking times returned to near-original levels and flavor was clean again. The appliance went on to provide a further 18 months of reliable use with no hardware issues. Total time investment: approximately 20 minutes per month.
The pattern holds especially true for messy, saucy, or breaded dishes. If you regularly cook recipes like chicken parmesan in the air fryer, where cheese, sauce, and breading all create layered residue, those 20 minutes a month become even more important — that type of buildup is among the hardest to address once it’s been heat-bonded over multiple cooks.
What Does the Future of Air Fryer Maintenance Look Like in 2026 and Beyond?
The air fryer market is evolving fast, and maintenance is becoming a design priority rather than an afterthought. Here’s what’s changing — and what to look for if you’re buying in 2026.
Self-cleaning interior coatings are appearing on premium models released in 2026. Ceramic and titanium-reinforced surfaces repel grease at a molecular level, reducing residue adhesion by an estimated 40–50% compared to standard PTFE coatings. Brands including Ninja and Instant Pot are incorporating these materials into their upper-tier lines as a genuine differentiator.
Full-cavity removable liners — not just basket liners, but pull-out interior trays that cover the walls and ceiling of the cooking chamber — are appearing in oven-style models. These make cleaning the entire interior as simple as removing the basket currently is.
App-connected maintenance reminders are now standard on some 2026 smart models. These units track cook cycles automatically and prompt you when a deep clean is due based on actual use data, rather than a fixed calendar schedule. Kitchen appliance analyst Jordan Park predicts: “By 2027, self-diagnostic cleaning alerts will be a baseline feature on mid-range air fryers — the same way printer ink level warnings became standard. You’ll know a clean is needed before you see any smoke.”
Even with all these advances, the fundamentals remain unchanged: clean often, clean gently, and catch problems early. No self-cleaning coating replaces a basic wipe-down routine, and no smart app reminder matters if you ignore it.
Frequently Asked Questions About Air Fryer Cleaning and Maintenance
Can you put air fryer baskets in the dishwasher?
Some baskets are officially dishwasher-safe — always check your specific model’s manual first. However, even baskets that are technically dishwasher-safe tend to show non-stick coating degradation faster when machine-washed regularly. Dishwasher temperatures and commercial-strength detergents are harsher than hand washing. If longevity of the coating matters to you, hand washing with warm soapy water and a soft sponge is always the safer choice, even when the manual permits the dishwasher.
How do you stop an air fryer from producing white smoke?
White smoke is almost always grease-related. The most common culprit is grease on the heating element or interior walls burning off during cooking. Clean the element with a dry soft-bristle brush, wipe the interior with a diluted vinegar solution, and run the appliance empty at 200°C for five minutes to burn off any remaining residue before your next cook. Adding a tablespoon of water to the bottom of the drawer during high-fat sessions also helps — it catches grease drips before they hit the hot base plate and vaporize.
Is baking soda safe to use for air fryer cleaning?
Yes, and it’s one of the best tools available. Baking soda is mildly abrasive enough to lift baked-on grease without scratching non-stick surfaces, and it neutralizes odors at the same time. Make a paste with a small amount of water, apply it directly to stubborn residue, leave for five minutes, then scrub gently with a soft sponge and rinse thoroughly. Make sure no baking soda residue remains inside the basket — any left behind will create a faint soapy taste during the next cook.
How often should you replace your air fryer basket?
With proper care, most air fryer baskets last two to five years. The clearest replacement signals are visible damage to the non-stick coating: peeling or flaking, deep scratches exposing bare metal, or large areas where the coating has worn through entirely. A compromised coating affects both cooking performance and raises questions about coating particles entering food. Replacement baskets are widely available for most major brands and cost a fraction of replacing the whole unit — always check model compatibility before ordering.
Can you use oven cleaner inside an air fryer?
No. Standard oven cleaners contain highly caustic alkalis — typically sodium hydroxide — that permanently strip and destroy non-stick coatings. They’re also very difficult to rinse completely from an air fryer’s interior cavity, and any residue left behind produces toxic fumes when the appliance heats up. Stick to baking soda paste, dish soap, and diluted white vinegar. These three are safe for the appliance, safe for your food, and effective enough to handle any level of grease buildup with some soak time and patience.
Why does my air fryer still smell bad after cleaning?
Persistent odor after a wash usually points to one of three things. Grease is still present on the heating element — clean it with a dry brush and run the empty unit at high heat for five to ten minutes. Moisture is trapped inside — always dry the basket and interior completely before reassembling. Or the non-stick coating itself is degrading and off-gassing a faint chemical odor. In that third case, the smell will persist regardless of cleaning; inspect the basket coating closely and replace it if there’s visible damage.
Do air fryer parchment liners actually make a difference?
Yes — significantly. Both parchment and silicone liners intercept the majority of grease and food debris before it reaches the basket surface, cutting post-cook cleanup time by 50–70% in most cases. The single rule to remember: never preheat with a liner sitting in an empty basket. Always place food in the basket first so the weight holds the liner down and prevents it from being drawn toward the heating element by the fan. With that one habit in place, liners are among the most practical air fryer accessories available.
Start Your Air Fryer Maintenance Routine Today
A well-maintained air fryer cooks better food, lasts significantly longer, and never fills your kitchen with smoke. The routine that achieves all of that is genuinely simple — it just needs to be consistent.
Your implementation sequence:
- This week: If it’s been more than a month since your last deep clean, do one now. Cover the basket, drawer, heating element, interior, and exterior.
- After every cook: Set a 60-second timer. Wipe the basket and drawer while still warm. Remove all debris from the drawer base.
- Every 3–5 uses: Wash the basket and drawer with warm soapy water. Check the non-stick coating for wear while you have it in hand.
- Monthly: Full deep clean — every surface, every component, every accessory.
- Ongoing habits: Add liners for greasy or messy recipes. Never use aerosol spray directly on the basket. Keep food loads at two-thirds capacity or below. Respect the temperature ceiling in your manual.
That’s the whole system. Follow it and your air fryer will reward you with years of reliable, great-tasting results. airfryerjunkie.com is here to help you get the most out of every appliance you own — from the first cook to the thousandth.
—