
Cleaning a Ninja air fryer is simpler than most people expect — but getting it right genuinely matters. Left uncleaned, old grease builds up, triggers smoke, and shortens the life of your non-stick coating. Whether you own a compact basket model, a dual-zone Foodi, or the larger oven-style unit, this guide walks you through how to clean an air fryer with Ninja-specific steps that work across every model in the range. Most of the time, the whole job takes under 10 minutes.
- Key fact: Most Ninja baskets and crisper plates are dishwasher-safe — but hand-washing protects the non-stick coating for longer.
- Biggest mistake: Using abrasive sponges or metal tools, which scratch the coating and cause sticking within months.
- Best habit: A quick wipe after every use prevents the bulk of stubborn, baked-on buildup.
- Model note: Dual-zone and oven-style Ninja models have extra components that need a slightly different approach.
Why Keeping Your Ninja Air Fryer Clean Actually Matters
It’s easy to see a clean-looking basket and assume the job is done. But grease and food particles left inside the unit — on the interior walls, around the heating element, or pooled at the base of the cavity — don’t just sit there quietly. They burn on the next cook, producing smoke that carries flavour into your food. Not a good flavour.
Appliance maintenance experts consistently identify neglected cleaning as the leading cause of air fryer smoke problems within the first year of use. Their standard recommendation: clean the basket after every use, and wipe the interior every 3–5 cooking sessions. Bump that up to every 2–3 sessions if you’re regularly cooking fatty foods like wings, sausages, or bacon.
There’s also the non-stick coating to think about. Ninja uses a PTFE-based non-stick surface on the basket and crisper plate components in most of their models. That coating is genuinely durable — but it degrades faster when exposed to harsh scrubbing pads, metal utensils, or high-pH cleaning agents. A well-maintained coating means food releases cleanly every time. A damaged one means sticking, uneven browning, and an early replacement purchase.
Finally, there’s cooking performance. A layer of baked-on grease on the crisper plate acts as insulation, slowing heat transfer to your food. Home appliance researchers have found that even a thin layer of residue buildup can add 10–15% to cook times — meaning longer waits and higher energy use for the same result. Keeping things clean genuinely makes the food better, too.
What You Need Before You Start
You don’t need a shelf full of specialist cleaners to keep a Ninja air fryer spotless. Simpler is better here — the fewer harsh chemicals involved, the lower the risk of damaging the coating or leaving residue that affects your next meal.
- Warm water and a small amount of dish soap (standard formulas — ultra-degreasing products can be too harsh)
- A soft non-abrasive sponge or microfibre cloth
- A soft-bristled brush — an old toothbrush is ideal for tight corners and mesh
- Paper towels or a clean dry cloth for drying
- Baking soda (for stubborn baked-on residue)
- White vinegar in a spray bottle (optional — excellent for grease film on glass surfaces and for neutralising odours)
What to leave under the sink: steel wool, metal scouring pads, abrasive powders, bleach, and aerosol cooking sprays. Aerosol sprays in particular leave a tacky, polymer-based residue on non-stick surfaces that’s extremely difficult to remove and causes coatings to break down prematurely — a fact Ninja themselves flag in their official care documentation. Stick with liquid dish soap and a soft cloth, and you’ll never cause accidental damage.
How to Clean the Ninja Air Fryer Basket and Crisper Plate (Step-by-Step)
The basket and crisper plate take the most punishment in everyday cooking. Every oil splash, crumb, and drip lands here. Cleaning them after each cook is the single most effective habit you can build — and when done consistently, it takes less than five minutes and prevents almost all of the heavy scrubbing situations people complain about.
- Let it cool completely. Wait at least 30 minutes after cooking before handling any components. Non-stick coatings are more vulnerable to damage when they’re still hot, and you’ll risk a burn if you rush this step.
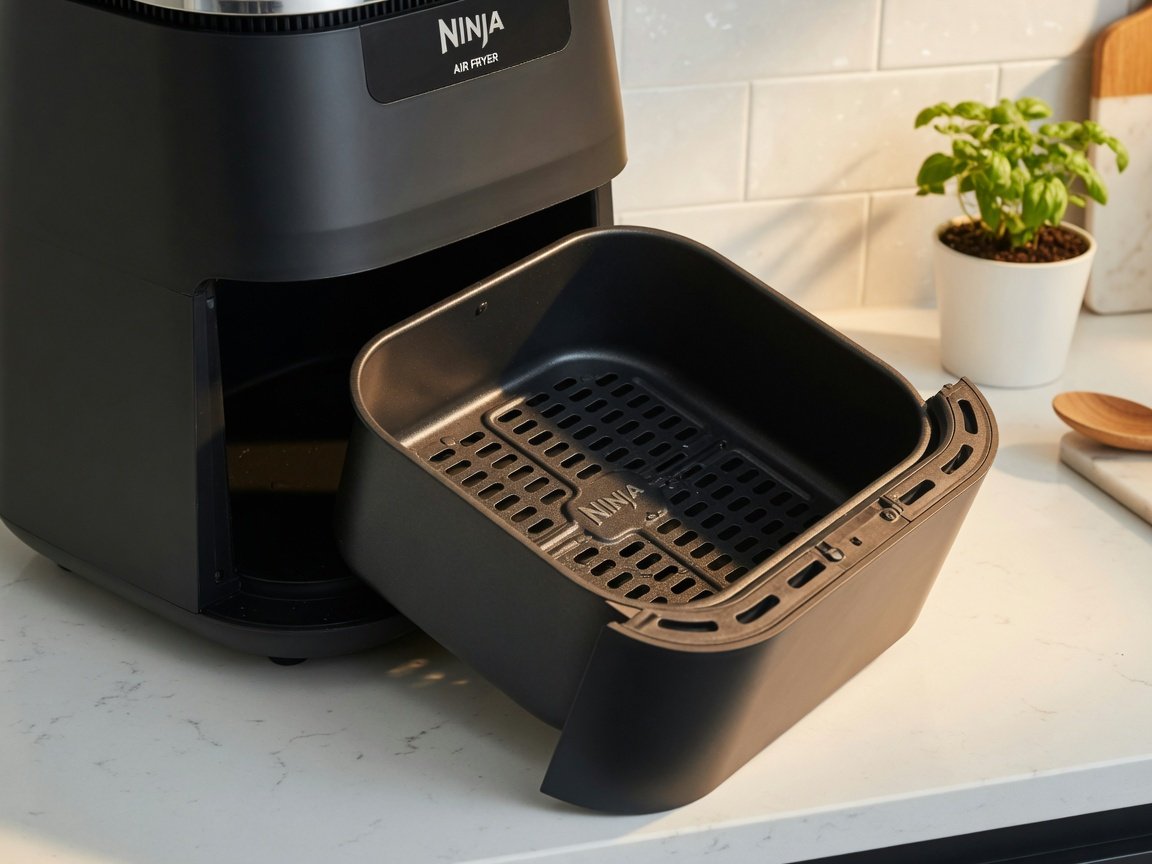
- Remove the basket and separate the crisper plate. On drawer-style models, the crisper plate lifts straight out from inside the basket. Pull the basket out of the drawer unit first, then separate the two pieces.
- Knock out loose crumbs. Hold each component over the bin and shake gently. A soft-bristled brush helps dislodge debris from the mesh of the crisper plate without scratching the surface.
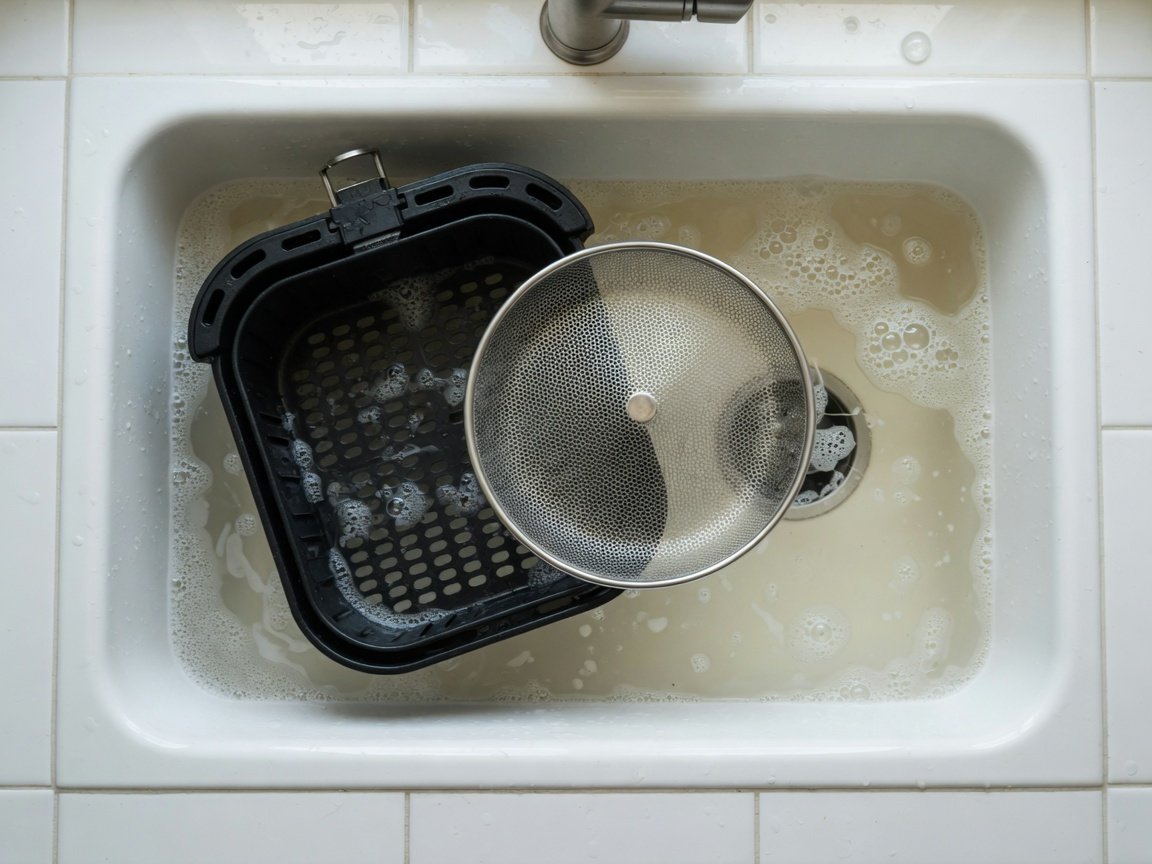
- Soak in warm soapy water for 5–10 minutes. Fill your sink with warm (not boiling) water and a small squirt of dish soap. Submerge both the basket and crisper plate. For everyday light use, this softening step does most of the cleaning work — almost everything wipes away after a proper soak.
- Scrub gently with a soft sponge. Work in small circular motions. Pay particular attention to the underside of the crisper plate, where pooled fat collects, and to the mesh holes where residue gets trapped. If something won’t shift with gentle pressure, soak for longer rather than scrubbing harder.
- Rinse thoroughly under clean running water. Soap residue left on the basket will burn during your next cook and produce an unpleasant flavour. Rinse until the water runs completely clear — this takes an extra 30 seconds and is absolutely worth it.
- Dry completely before reassembling. Pat dry with a clean cloth, then leave the basket and crisper plate on a rack for at least 20 minutes. Moisture trapped inside the unit over time can cause issues with the heating element and the internal electronics.
For most everyday cooks, this 7-step routine keeps the basket in excellent condition for years. If you want to reduce the cleaning burden even further — especially for greasy cooks — a liner inside the basket intercepts drips before they reach the crisper plate and can cut post-cook cleanup time by more than half.
How to Clean the Inside of Your Ninja Air Fryer
The interior of the unit — the cavity walls, the heating element, and the ceiling of the cooking chamber — needs regular attention even if it looks clean from the outside. Grease vapour rises during every cook and condenses on interior surfaces. Over time, it thickens into a sticky film that eventually burns. Properly cleaning inside of air fryer units is the step most people skip — and it’s exactly where the majority of smoke problems begin.
Here’s how to clean the interior safely and effectively:
- Unplug the unit first. Always. Non-negotiable. Never clean an air fryer that’s connected to a power source.
- Turn the unit upside down. This gives you clear, direct access to the heating element, which sits at the top of the cooking cavity. Look for any visible grease deposits or burnt residue on or around the coil.
- Wipe the interior walls. Dampen a microfibre cloth with warm soapy water and wring it out thoroughly — you want damp, not wet. Wipe all interior surfaces in gentle, overlapping strokes. Never spray water directly inside the unit.
- Clean the heating element carefully. If you spot grease on the heating coil, apply a small amount of baking soda paste (2 tablespoons of baking soda mixed with just enough water to form a thick consistency) using an old toothbrush. Leave it for 2–3 minutes, then gently brush and wipe away. Never scrub the element aggressively or use anything metal near it.
- Clean the exterior and vents. Wipe the outside of the unit with a damp cloth. The ventilation grilles at the back collect dust and grease residue over time — a dry brush or a careful wipe clears them and keeps airflow unrestricted, which matters for both cooking performance and appliance longevity.
- Leave the drawer open to dry. Before reassembling, leave the unit open for at least 20 minutes. This ensures any remaining moisture evaporates fully before your next cook.
How often? Every 3–5 uses works well for most people cooking everyday meals. For high-fat cooks — wings, bacon, sausages, anything that spatters heavily — increase that to every 2–3 uses. And any time you notice smoke at the start of a cooking session, clean the interior before your next meal regardless of schedule. Smoke is always a cleaning signal.
How to Clean Ninja’s Dual-Zone (Two-Basket) Models
Ninja’s dual-zone air fryers — including the DZ201, DZ401, and the widely used Ninja Foodi Smart XL 2-Basket — are brilliantly practical for cooking two different foods simultaneously. Cleaning them follows exactly the same method as standard basket models — just doubled. Two baskets, two crisper plates, two drawer cavities, and (on some models) a removable partition divider.
Practical tips that make dual-zone cleaning more manageable:
- Remove both drawers simultaneously and soak them together in a large basin to save time — having both in the water at once is faster than two sequential soaks.
- The removable partition divider (if your model has one) needs washing on its own — food residue builds up on both faces of it.
- The channel between the two cooking zones catches splattered grease easily — give this area a specific wipe with a damp cloth after each use to prevent buildup.
- Many dual-zone models share a single main heating element. Check your model’s user manual to understand the internal layout before wiping near any internal components.
- Rotate which basket handles the fattier foods across sessions — this distributes wear more evenly between the two and keeps cleaning needs balanced.
One practical upside of dual-zone models: because you’re often splitting food across two smaller baskets rather than overloading one, splatter per basket tends to be less severe. Consistent quick washes after each use keep these models very manageable day-to-day.
How to Clean the Ninja Foodi and Oven-Style Models
Ninja’s oven-style and multi-cooker models — the Ninja Foodi 9-in-1 Air Fryer Oven being among the most popular — have a fundamentally different interior to standard basket models. Instead of a pull-out drawer, there’s a front-opening door, wire racks, an air fry basket, and a crumb tray. More components, more surface area — but also more room to manoeuvre a cloth inside.
- Remove all accessories. Take out the wire rack, air fry basket, crumb tray, sheet pan, and any other removable components before starting. Each needs to be cleaned separately.
- Empty and wash the crumb tray immediately. This component accumulates debris fastest — tip crumbs into the bin, wash the tray with warm soapy water, and dry thoroughly. Burning crumbs on a dirty crumb tray are the number-one cause of smoke in oven-style models.
- Wash racks and baskets. Most Ninja oven accessories are listed as dishwasher-safe. For any component with a non-stick coating, hand-washing in warm soapy water extends that coating’s life considerably. Soak, scrub gently, rinse completely, dry before replacing.
- Wipe the interior walls and ceiling. With the door fully open, use a damp cloth to wipe all interior surfaces. The ceiling near the heating elements collects the most condensed grease vapour — spend extra time and care here.
- Clean the door glass. A light spray of undiluted white vinegar on the inner glass panel, left for 30 seconds and wiped with a clean cloth, cuts through grease film in a single pass. The glass goes from hazy to clear immediately.
- Wipe the exterior and door handle. A damp cloth handles both. Dry promptly to avoid water marks on any stainless steel surfaces.
For oven-style Ninja models, the crumb tray needs attention after every single use — it fills up faster than most people expect, and letting crumbs accumulate and burn creates persistent smoke that’s frustrating to resolve. Think of the crumb tray as the daily maintenance item for these models.
Can You Put Ninja Air Fryer Parts in the Dishwasher?
Yes — and this is one of the genuinely user-friendly things about Ninja as a brand. The vast majority of Ninja air fryer baskets, crisper plates, drawer units, crumb trays, and wire racks are officially listed as dishwasher-safe. For occasional cleaning or when time is short, this is a completely legitimate option.
The key distinctions to know:
- Dishwasher-safe on most models: Baskets, crisper plates, drawer units, crumb trays, wire racks.
- Never dishwasher-safe: The main unit housing, power cord, heating element, or any component with electrical connections.
- Use the top rack: Lower rack cycles run hotter with more intense water pressure. The top rack reduces thermal and mechanical stress on non-stick coatings.
- Choose a mild detergent: Enzyme-heavy or “powerball” dishwasher tablets accelerate non-stick wear over repeated cycles. A standard or gentle-formula detergent is significantly better for longevity.
The honest trade-off: the dishwasher is convenient, but frequent high-temperature dishwasher cycles do shorten non-stick coating lifespan measurably compared to hand-washing. If you’re using your Ninja daily, hand-washing is the better long-term choice. The dishwasher works well for occasional use or genuine time constraints. For a thorough breakdown of care strategies by appliance type, the complete guide to air fryer cleaning and maintenance covers every category with specific recommendations.
How to Tackle Stubborn Grease and Baked-On Residue
Even with consistent after-use cleaning, some cooks leave behind residue that warm soapy water alone won’t shift. Carbonised grease rings, burnt-on drips, discoloured crisper plates — these are all part of regular cooking life. Here’s how to resolve them without reaching for anything abrasive or chemical-heavy.
Baking soda paste. Mix 2 tablespoons of baking soda with a small amount of water to form a thick paste. Apply to the stubborn area and leave for 15–20 minutes. The mild alkalinity breaks down grease bonds without scratching non-stick surfaces. Scrub gently with a soft brush and rinse. This resolves the vast majority of baked-on residue situations — home cooking experts cite it as the most effective gentle degreaser available in most kitchens.
Extended hot water soak. Fill the basket with very hot water and a generous squeeze of dish soap. Leave for 20–30 minutes — considerably longer than your standard post-cook soak. Most baked-on residue softens enough after 30 minutes that it wipes away with almost no pressure required. This method is particularly useful for heavy grease deposits on the base of the drawer unit.
Steam cleaning. Place a small oven-safe bowl or ramekin containing roughly 100ml of water inside the basket (or directly in the cooking chamber for oven-style models). Run the air fryer at 200°F / 93°C for 5 minutes. The steam softens grease on the interior walls and the area around the heating element, often reaching places that are difficult to access with a cloth. This is the best method for the cavity ceiling.
White vinegar spray. Spray undiluted white vinegar directly onto greasy surfaces, wait 5–10 minutes, and wipe clean. Vinegar’s acidity cuts through fat deposits effectively and simultaneously neutralises cooking odours. It works particularly well on the interior walls of basket models and on the door glass of oven-style units.
If repeated cleaning attempts don’t fully resolve sticking or discolouration — or if you notice the non-stick surface starting to peel or flake — the Ninja air fryer repair and maintenance guide explains how to assess when coating wear crosses from cosmetic to functional, and what your realistic options are at each stage.
How to Prevent Mess and Make Every Clean-Up Faster
The most effective cleaning strategy is minimising the mess in the first place. A handful of consistent habits turn a 10-minute scrub into a 2-minute wipe — and they cost nothing to implement beyond a small behaviour change.
Don’t overfill the basket. Crowding forces hot circulating air to bounce off food surfaces and carry oil onto the walls and ceiling of the cooking cavity. Leave space for air to circulate properly — your food cooks more evenly, and the interior stays noticeably cleaner over time. Appliance care specialists estimate that proper loading reduces interior grease buildup by 30–40% versus an overloaded basket.
Pat food dry before it goes in. Wet or heavily marinated food releases steam and oil explosively when exposed to hot circulating air. Patting surfaces dry with paper towels before loading reduces splatter significantly — this is especially important for chicken pieces, fish fillets, and vegetables with high moisture content. A 10-second pat-down saves minutes of cleaning afterward.
Use a liner. Parchment paper liners or reusable silicone basket liners sit inside the crisper plate and intercept drips, crumbs, and oil splatter before they reach the basket surface. Understanding how to use air fryer liners properly — including which foods work with them and which need the direct crisper plate for best results — is one of the simplest and most effective upgrades for reducing your post-cook cleaning time by 50% or more on greasy cooks.
Wipe down while still slightly warm. Not hot — wait until the basket is comfortable to touch. But a basket caught at warm temperature wipes far more easily than one left to go fully cold. Residue hardens as it cools, so a quick wipe 20–30 minutes after cooking is dramatically easier than the same job an hour later. This single habit eliminates most soaking needs entirely for everyday meals.
Add a little water to the base for fatty cooks. For high-fat foods like chicken wings, sausages, or bacon, add 2–3 tablespoons of water to the bottom of the drawer below the basket before cooking. The water catches dripping fat and prevents it from burning onto the base of the unit. This simple trick cuts smoke output significantly and reduces the baked-on residue you’ll face during cleanup.
And if you’re considering your next appliance purchase: it’s worth knowing that an air fryer with stainless steel basket tolerates more aggressive scrubbing without coating concerns — though it does require its own specific care approach and behaves differently from the non-stick models in Ninja’s current lineup.
When Should You Do a Full Deep Clean?
Beyond the regular basket wash after each use, every Ninja air fryer benefits from a thorough session every 2–4 weeks. Think of this as your deep cleaning air fryer appointment — the one where you go beyond the basket and crisper plate to address every surface, including the interior cavity, the heating element, the exterior vents, and any drip trays or crumb catchers specific to your model.
Signs you’re overdue for a deep clean:
- Visible smoke or a burning smell at the start of a cooking session
- Discolouration on the interior cavity walls or around the heating element
- Food sticking to the basket despite the non-stick coating
- A persistent odour that doesn’t clear after a standard cleaning
- Grease dripping from the unit onto your countertop during cooking
- Noticeably longer cook times for foods you cook regularly
For a proper deep clean, follow all the standard steps — but slow down and be thorough. Extend the basket soak to 30 minutes rather than 10. Apply baking soda paste to any discoloured areas and let it work for 20 minutes. Spend focused time on the heating element area with a soft toothbrush. Check and clean all exterior vents. If your model has a drip tray, ensure it’s completely empty and washed before replacing. Do a smell check at the end — if anything still smells of old grease, run the steam method (bowl of water at 200°F / 93°C for 5 minutes) before calling it done.
While you’re doing a deep clean, it’s also the right moment to honestly assess the condition of the basket and crisper plate. If the non-stick coating shows visible chips, peeling sections, or significant thinning in high-contact areas, continuing to cook on it isn’t ideal. Ninja air fryer replacement baskets are available for most popular models, and fitting a new basket often extends the appliance’s useful life by several years at a fraction of the cost of a new unit.
Ninja Air Fryer Cleaning at a Glance
| Model Type | Dishwasher-Safe Parts | Key Cleaning Note |
|---|---|---|
| Standard basket (AF100, AF101, AF161) | Basket, crisper plate | Simplest model to clean — two removable parts plus the cavity |
| Dual-zone (DZ201, DZ401, FlexBasket) | Both baskets, both crisper plates, both drawers | Soak both baskets together; clean the inter-zone channel after every use |
| Ninja Foodi multi-cooker | Cooking pot, crisper tray, reversible rack | Pressure cooking lid cleaned separately; never submerge the main unit |
| Oven / flip models (SP series) | Crumb tray, wire rack, air fry basket | Empty crumb tray after every use; clean door glass with vinegar |
| Max XL / Pro series | Basket, crisper plate | Larger surface area — allow 10+ minutes of soaking time minimum |
Your Ninja Air Fryer Cleaning Action Plan
Here’s the cleaning schedule that keeps a Ninja air fryer performing at its best, organised by frequency so you know exactly what to do and when — no guesswork required.
After every use (5 minutes): Remove basket and crisper plate, soak in warm soapy water for 5–10 minutes, scrub gently, rinse completely, and dry before reassembling. Wipe the exterior of the drawer. This single habit prevents 80–90% of stubborn buildup before it ever starts.
Every 3–5 uses (5–10 minutes): Wipe the interior cavity walls and the heating element area with a damp cloth — unplug first, and turn the unit upside down for access to the element. Check the exterior vents for dust and wipe if needed. This is the step that keeps smoke incidents from happening.
Every 2–4 weeks (20–30 minutes): Full deep clean of every surface. Extended soaks, baking soda paste on any stubborn areas, thorough interior wipe, vent cleaning, and a close condition check of the basket coating. This is the session that keeps your Ninja working like new for years and gives you a chance to catch any wear before it becomes a problem.
As needed (immediately): Address smoke, persistent odour, or sticking the moment they appear rather than waiting for the next scheduled session. These are signals of excess buildup that need attention before the next cook — pushing through compounds the problem every time.
Stick to this schedule and your Ninja will reward you with better cooking results, fewer smoke incidents, and a working lifespan that stretches well beyond what you’d expect from an average kitchen appliance. The time investment is minimal — the return is genuinely worth it.
Frequently Asked Questions
How often should I clean my Ninja air fryer?
The basket and crisper plate should be washed after every use. The interior cavity needs a wipe-down every 3–5 cooking sessions for everyday meals, or every 2–3 sessions for fatty foods like wings, sausages, or bacon. A thorough deep clean every 2–4 weeks covers everything else and keeps the appliance in genuinely good condition.
What’s the quickest way to clean a Ninja air fryer basket?
Let it cool, then soak the basket and crisper plate in warm soapy water for 5–10 minutes. The soak does the heavy lifting — most residue wipes away with almost no pressure afterward. For models with dishwasher-safe baskets, the top rack is a valid option when you’re short on time. The key is doing it after every use rather than letting residue build up over multiple cooks.
Can I use oven cleaner on my Ninja air fryer?
No. Oven cleaners typically contain sodium hydroxide (lye), which damages Ninja’s non-stick coating and can corrode metal components. Stick to warm soapy water for everyday cleaning, baking soda paste for stubborn spots, and white vinegar for grease film and odours. These are all more than effective enough for any air fryer cleaning task — and they won’t void your warranty or damage the appliance.
My Ninja air fryer smells like burning after I cleaned it — what’s happening?
Two likely causes: soap residue that wasn’t fully rinsed away, or moisture still present near the heating element. Always rinse until the water runs completely clear and allow at least 20–30 minutes of air drying before plugging the unit back in. If the smell persists after the first cook, run the unit empty at 200°F / 93°C for 5 minutes — this burns off any remaining trace residue safely.
Is it safe to keep cooking if the non-stick coating is chipping?
No — if you can see visible chips or flaking, replace the basket rather than continuing to cook in it. Modern non-stick coatings are chemically inert at cooking temperatures, but ingesting coating fragments isn’t something you want to risk. Replacement baskets are available for most current Ninja models and are a straightforward, affordable fix that restores the appliance to full performance.
Do I still need to clean my Ninja if I use liners every time?
Yes — liners dramatically reduce basket mess, but they don’t eliminate cleaning entirely. Grease vapour still coats the interior walls and heating element regardless of what’s in the basket. With consistent liner use, your basket cleaning becomes much faster and easier, but a regular interior wipe-down and periodic deep clean remain important for long-term performance and odour control.
How do I get a persistent burnt smell out of my Ninja air fryer?
Start with a thorough cleaning of the interior — walls, ceiling, and the heating element area. Then use the steam method: place a small oven-safe bowl containing 100ml of water mixed with 1 tablespoon of white vinegar inside the basket and run at 200°F / 93°C for 5–8 minutes. The steam distributes the vinegar’s odour-neutralising properties throughout the cavity, reaching surfaces a cloth can’t. Leave the drawer open afterward for 30 minutes to air out. This combination resolves most persistent burnt odours in a single session.
Which Ninja air fryer models have dishwasher-safe baskets?
Most current Ninja models — including the AF100, AF101, AF161, AF181, DZ201, DZ401, and the majority of Foodi variants — have baskets and crisper plates rated as dishwasher-safe. Always verify in the care section of your specific model’s manual, as Ninja occasionally updates material specifications between production runs. When using the dishwasher, place all components on the top rack and use a mild detergent to minimise cumulative coating wear.
