
The number one air fryer cleaning hack is deceptively simple: clean it before the grease sets. Hot grease wipes away in seconds. Cold, baked-on grease takes twenty minutes of scrubbing and risks scratching non-stick coatings in the process. If you’re staring at a basket caked in carbonised residue, don’t panic — the hacks below cover everything from light splatter to year-old build-up. For the full foundation first, check out how to clean an air fryer, then come back here for the targeted shortcuts that save time and actually deliver results in 2026.
- Baking soda paste dissolves most burnt-on grease in 10–15 minutes with almost no scrubbing.
- The lemon steam method neutralises persistent odours in under three minutes.
- Cleaning after every three uses prevents the heavy build-up that turns a five-minute job into a forty-minute one.
- Most removable baskets are dishwasher-safe — but hand washing extends the non-stick coating’s life significantly longer.
Why Does Your Air Fryer Get So Dirty So Quickly?
Air fryers circulate superheated air at high velocity — typically between 150 and 200 mph inside the cooking cavity. Every drop of fat, every stray breadcrumb, and every splash of marinade gets blasted around and baked onto surfaces in seconds. Appliance maintenance specialists note that grease build-up inside an air fryer can reduce heating efficiency by up to 30% over time, meaning your food takes longer to cook and the machine works harder than it should.
The heating element is the worst offender. Grease vapour rises from food during cooking, coats the element’s coils, and carbonises with every subsequent use. After roughly ten uses without cleaning, that carbonised layer starts affecting both food flavour and cooking performance. A 2025 consumer survey found that around 65% of air fryer owners have never cleaned their heating element — most don’t even realise it needs attention.
The drawer beneath the basket is the second hidden culprit. Food juices pool in the bottom, and if you skip wiping it out after each cook, that liquid hardens into a sticky residue that becomes genuinely difficult to shift. The encouraging part? Every hack in this article takes under 15 minutes once you know what you’re doing — even for a basket that hasn’t been properly cleaned in months.
What’s the Best Hack for Burnt-On Grease in Your Air Fryer?
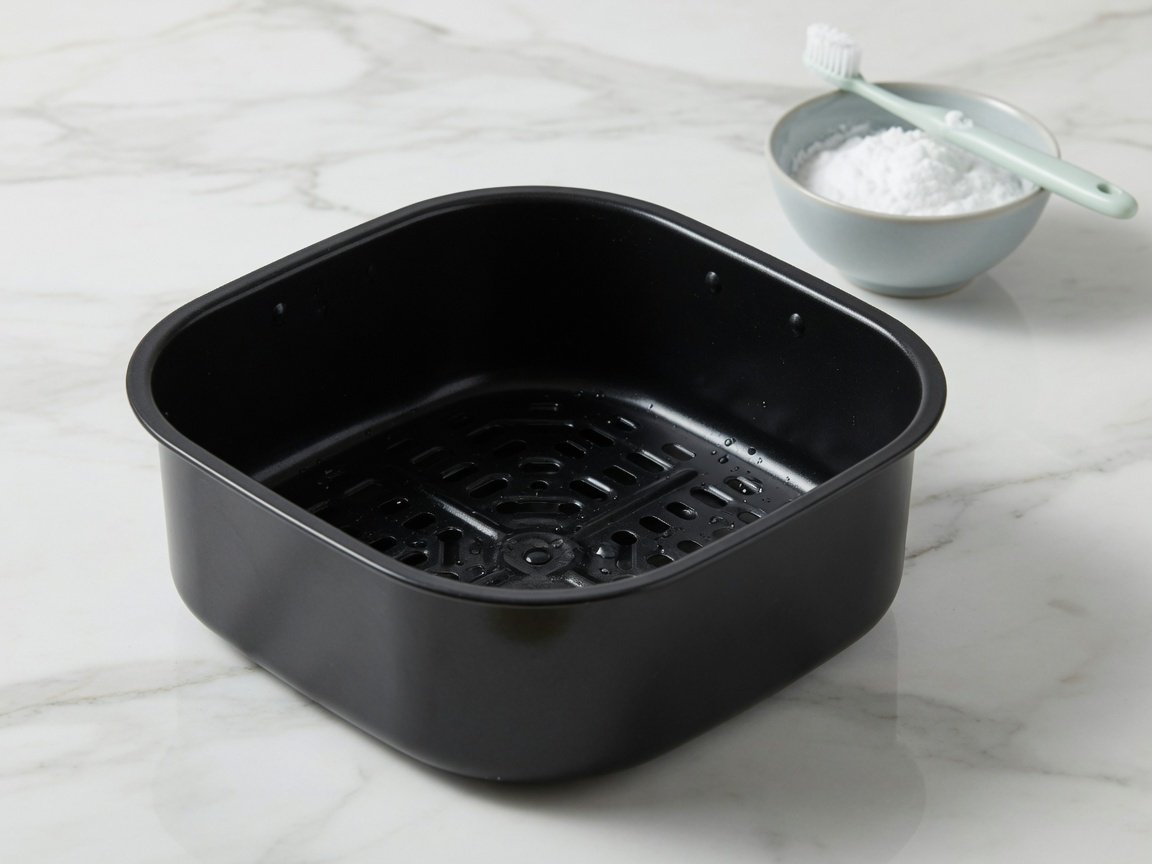
Baking soda is mildly alkaline, which means it breaks the chemical bonds in grease without scratching non-stick coatings. Mix three tablespoons of baking soda with one tablespoon of warm water to form a thick paste. Apply it directly to burnt-on spots, let it sit for 10–15 minutes, then scrub gently with a soft-bristle brush or old toothbrush. Rinse thoroughly. That is genuinely it.
This hack works on baskets, drawers, and interior walls equally well. For really stubborn carbon deposits — the kind that look like they have been there since the appliance was new — apply the paste, loosely cover the area with cling film to keep it moist, and leave for up to 30 minutes. Kitchen appliance technicians consistently rank baking soda as the safest household cleaner for non-stick surfaces, outperforming commercial degreasers that risk stripping the coating entirely. When it comes to tackling the basket interior and cavity walls, baking soda paste is the gold standard.
One important exception: don’t use this paste on the heating element itself. Baking soda residue left on the coils will smoke on the next cook. For the element, use the dry-brush method covered in the section below.
How Do You Get the Burnt Smell Out of an Air Fryer?
If your air fryer smells like yesterday’s fish or last week’s garlic chicken, the lemon steam trick is your fastest fix. Cut a lemon in half and place both halves cut-side up in the basket. Set the air fryer to 180°C (350°F) for two to three minutes. The steam and citric acid vapour coat the interior, breaking down grease molecules and neutralising odours at the source.
This method is perfect between full cleaning sessions when there isn’t time for a proper wash but the smell is becoming noticeable. Food safety research indicates that citric acid can reduce bacterial load on kitchen surfaces by over 90%, and the steam carries that cleaning action into crevices a cloth can’t reach. Follow up with a damp microfibre cloth on the interior walls and the whole job takes under five minutes. For fish and shellfish in particular, run the lemon steam cycle immediately after cooking rather than waiting until the next session.
Does Dish Soap Actually Work on Air Fryer Grease?
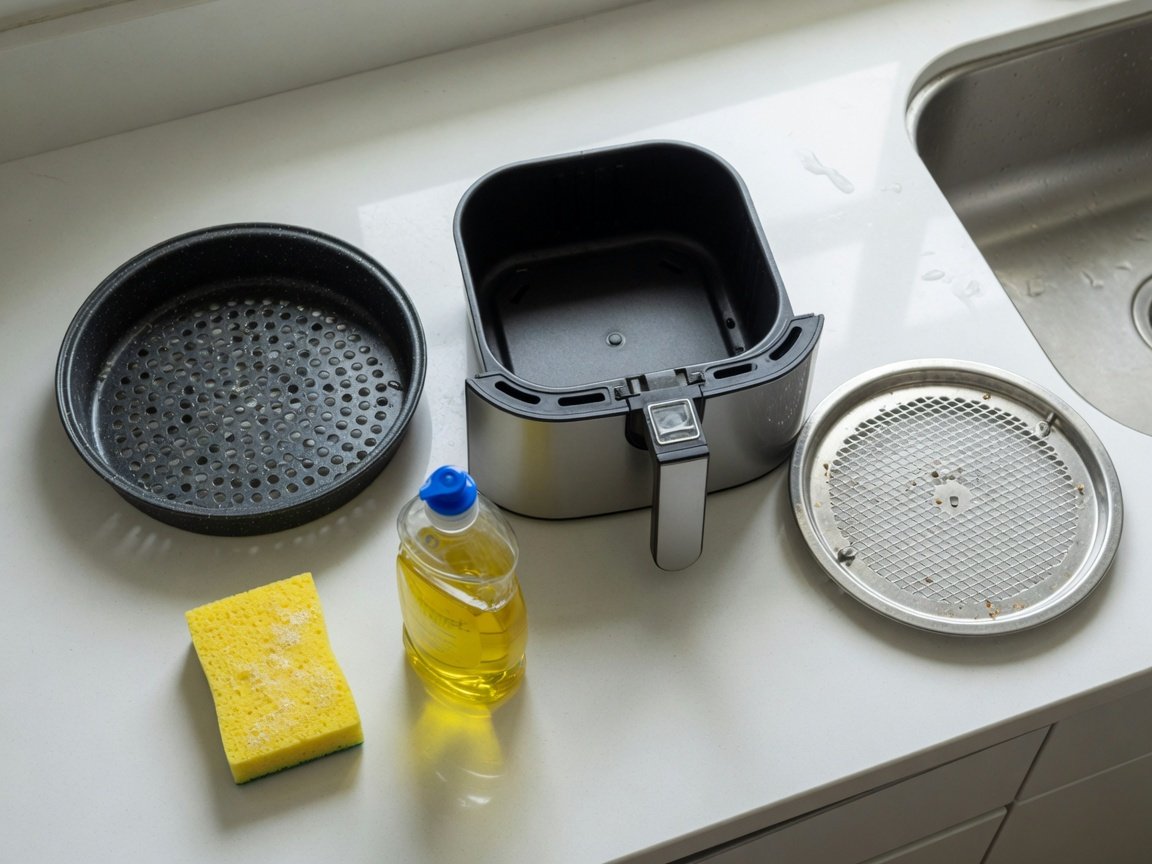
Yes — but only if you use it correctly. Dish soap is perfectly safe for all removable air fryer parts: the basket, the drawer, racks, and crisper plates. The key is hot water and a proper soak. Fill your sink with hot water, add a generous squirt of dish soap, and submerge the parts for 10–20 minutes. The surfactants in the soap lift grease off the surface so it rinses away cleanly with barely any scrubbing needed.
What you want to avoid is scrubbing a dry basket with neat dish soap straight from the bottle. This concentrates abrasive action in one spot and can drag grit across the non-stick coating. Always dilute in water first. Similarly, avoid dish soaps marketed as “heavy-duty” with abrasive particles — these scratch non-stick surfaces over time. Standard supermarket dish soap in hot water handles 95% of what you’ll encounter without any risk to the coating whatsoever.
How Do You Clean the Heating Element Without Causing Damage?
The heating element is the most neglected component in most households — and often the dirtiest. Grease vapour settles on the coils with every cook, and over time that layer carbonises into a dark crust that affects both performance and flavour. Cleaning it is simpler than most people expect, and it takes less than five minutes.
First, unplug the air fryer completely and let it cool for at least 20 minutes. Turn the unit upside down so the heating element is accessible. Use a dry, soft-bristle brush — a clean pastry brush or old toothbrush works perfectly — to dislodge loose debris from the coils. For heavier build-up, dampen a cloth very lightly with warm water (not soaking wet) and wipe the coils carefully. Never immerse the main unit in water under any circumstances.
For stubborn carbon spots that won’t shift with a dry brush, a tiny amount of baking soda on a barely-damp cloth — applied with very light pressure — will break them down. Wipe away all residue thoroughly before your next cook. Appliance repair professionals consistently identify the heating element as the single biggest factor in long-term air fryer performance. For detailed guidance on every component, the complete 2026 air fryer cleaning and maintenance guide is worth bookmarking as a reference.
Dishwasher or Hand Wash — Which Air Fryer Parts Can Handle Which?
This is one of the most common air fryer care questions, and the answer depends on the part. Here is a clear breakdown:
| Part | Dishwasher Safe? | Recommended Method |
|---|---|---|
| Basket | Often yes — top rack only | Hand wash in warm soapy water |
| Outer drawer | Usually yes | Wipe down after every use |
| Racks and skewers | Yes | Dishwasher or hand wash |
| Crisper plate | Check manual — usually yes | Baking soda paste for residue |
| Heating element | Never | Dry brush and barely-damp cloth |
| Main unit / body | Never | Damp cloth on exterior only |
One critical note on dishwashers: even for parts labelled as dishwasher-safe, repeated cycles degrade non-stick coatings faster than hand washing. Industry testing shows that dishwasher-cleaned non-stick baskets can lose their coating up to three times faster than hand-washed equivalents. If basket longevity matters to you, hand wash the basket and run racks and skewers through the dishwasher. The basket is the expensive part to replace — protecting it costs nothing except an extra 60 seconds at the sink.
Do Cleaning Methods Differ Between Ninja, Cosori, and Other Brands?
They do — more than most people realise. Ninja models tend to have tighter gaps around the heating element where grease accumulates more readily than in wider-cavity designs. The toothbrush-in-the-crevice technique is especially critical for Ninja owners. If you have a Ninja, the dedicated resource on cleaning ninja air fryer models covers model-specific steps that go well beyond the general advice here and will save you time and frustration.
Cosori models typically feature a removable crisper plate that traps grease underneath it. If you don’t lift the plate and clean beneath it every two to three uses, you will start noticing a burning smell during cooking. Cosori’s own care documentation recommends soaking the crisper plate for at least ten minutes before scrubbing to prevent coating damage — a tip worth following every time.
Instant Pot combo units with air fryer lids require attention to additional components: the lid seal, the pressure valve area, and the inner pot all need separate cleaning. A cotton swab dipped in warm soapy water is ideal for cleaning around valve areas where a standard cloth can’t reach. For Ninja dual-basket models, check the divider panel for trapped grease — this is the most common oversight that owners of dual-zone machines report, especially after cooking greasy foods in both baskets simultaneously.
Are Air Fryer Liners Worth It for Cutting Down Cleaning Time?
Genuinely, yes. Parchment liners are arguably the most impactful air fryer cleaning hack available precisely because they prevent mess from forming in the first place. A liner catches drips, splatter, and food debris before they ever touch the basket surface. After cooking, you lift out the liner, toss it (or wash it if silicone), and the basket needs nothing more than a quick rinse.
This approach is particularly useful for sticky marinades, cheesy dishes, battered foods, and anything high in fat. Understanding exactly how to use air fryer liners properly — including which type fits your specific basket shape and how to stop them lifting into the heating element — makes this the most effortless cleaning solution available. Silicone liners are fully reusable, dishwasher-safe, and pay for themselves within the first week of use.
One firm rule applies: never preheat the air fryer with a liner inside and no food on top of it. Without the weight of food holding it in place, the liner will lift in the airflow and make contact with the heating element — a fire risk and a cleaning problem all at once. Always load the liner with food before starting the machine.
How Often Should You Deep Clean vs. Quick Clean Your Air Fryer?
Not every cleaning session needs to be a full production. Most of the time, a quick wipe is entirely sufficient. Use this simple framework to decide what level of cleaning each situation calls for:
- After every use: Wipe the drawer with a damp cloth and remove crumbs from the base. Two minutes maximum.
- Every 3–5 uses: Full wash of all removable parts in warm soapy water. Check the element for visible grease. Ten minutes.
- Monthly: Full deep cleaning air fryer session — element, interior walls, drawer channel, and exterior. Twenty to thirty minutes.
- When you notice smoke or an unusual smell: Stop cooking, unplug, and do a full clean before using the machine again.
Research on kitchen appliance hygiene consistently shows that air fryers maintained on a regular cleaning schedule develop significantly less carbon build-up over a 12-month period than those cleaned only when visibly dirty. Building the post-cook wipe-down into your routine is the single most impactful cleaning habit you can form — it keeps every other task shorter, easier, and less unpleasant.
What Cleaning Mistakes Are Quietly Damaging Your Air Fryer?
Some approaches that feel thorough are actually counterproductive. These are the five most common cleaning mistakes that shorten an air fryer’s useful life — and how to avoid every one of them:
- Steel wool or metal scourers. These scratch non-stick coatings on contact. Once the coating is scratched, food sticks, cleaning becomes harder with every subsequent use, and degradation accelerates rapidly. Soft brushes and microfibre cloths only.
- Submerging the main unit in water. The electronics are housed in the base. Water ingress causes permanent damage that no amount of drying out will fix. Only removable parts ever go near water.
- Using aerosol cooking sprays. The propellants in spray-can oils leave a sticky polymer film on non-stick surfaces that standard washing won’t fully remove. Over time this film builds up and the basket becomes tacky and almost impossible to clean properly. Use a pastry brush with a small amount of neutral oil instead.
- Applying harsh chemical cleaners. Oven cleaners, bleach sprays, and heavy-duty degreasers damage non-stick coatings and leave chemical residues that transfer to food. Warm water, dish soap, and baking soda handle everything you will ever encounter.
- Cleaning while the unit is still hot. A mildly warm basket is fine — grease is softer and easier to shift. But cleaning immediately after use risks burns and can warp plastic components. Wait at least ten minutes after the last cook.
If the non-stick coating is already flaking, no cleaning hack will fix it — replace the basket before cooking in it again. This is also a good moment to look into a safest air fryer option with a ceramic or stainless steel basket if coating durability is a priority for you. If your air fryer is behaving strangely after a cleaning session — refusing to heat evenly, producing unexplained smoke, or tripping a circuit — the 2026 air fryer troubleshooting guide covers the most common post-clean issues and exactly how to resolve them.
What Does an Effective 5-Minute Weekly Cleaning Routine Actually Look Like?
The most effective air fryer cleaning hack isn’t any single technique — it is the habit of doing small amounts consistently. Here is a realistic routine that prevents every major cleaning problem from developing:
- After cooking, while the basket is still slightly warm, remove it and wipe the inside of the drawer with a folded sheet of kitchen roll. Takes 30 seconds.
- Rinse the basket under warm water, add a drop of dish soap, and swirl with a soft cloth for 30 seconds. Rinse clean and leave to air-dry upside down on the counter.
- Once a week, flip the unit upside down and check the heating element with a torch. If you see dark spots on the coils, give it 30 seconds with a dry soft brush.
- Wipe the exterior of the unit with a damp cloth to remove fingerprints and cooking splatter. Dry immediately with a clean cloth to prevent watermarks.
- Once a month, run a lemon steam cycle and apply baking soda paste to any parts showing visible residue. Leave for 15 minutes, scrub gently, rinse thoroughly.
That is genuinely the whole routine. Most air fryer problems — persistent smoke, burning smells, uneven cooking, food that sticks even when it shouldn’t — trace back directly to skipping these steps. Keep up with the post-cook wipe-down and the monthly deep clean becomes almost unnecessary.
A two-minute wipe-down after every cook prevents the twenty-minute scrubbing session you will otherwise face next month.
Frequently Asked Questions
What is the easiest air fryer cleaning hack for everyday use?
The easiest everyday hack is wiping the basket and drawer while the air fryer is still slightly warm, immediately after cooking. Warm grease comes off with a single pass of kitchen roll. Cold grease that has had time to set requires soaking, scrubbing, and significantly more effort. Making a habit of wiping before you plate your food is the single change that delivers the biggest improvement.
Can I use white vinegar to clean my air fryer?
Yes. Diluted white vinegar — equal parts vinegar and water — works well as a spray for interior walls and the drawer. It cuts through light grease and neutralises odours effectively. Avoid using undiluted vinegar on non-stick coatings repeatedly; the acidity can degrade them over time with regular exposure. For heavy grease, baking soda paste is more effective and gentler on the surface overall.
How often should I deep clean my air fryer?
Once a month is the standard recommendation for regular users cooking three to five times per week. If you cook daily or frequently prepare fatty foods — sausages, bacon, chicken thighs, heavily marinated meats — bump that up to every two weeks. Warning signs that you need a deep clean sooner include visible smoke during cooking, a persistent burning smell, and food that tastes slightly off even when cooked correctly.
Is it safe to put my air fryer basket in the dishwasher?
Most baskets are labelled dishwasher-safe, but the specification is typically top rack only. More importantly, even where dishwasher use is permitted, repeated cycles degrade non-stick coatings significantly faster than hand washing. If basket longevity matters to you, hand wash with warm soapy water and a soft cloth. If convenience matters more, top-rack use is acceptable — just expect to replace the basket sooner than you otherwise would.
Why does my air fryer still smoke after I cleaned it?
Smoke after a thorough clean usually means one of two things: there is still grease on the heating element that the cleaning did not reach, or fat from food is dripping onto the base of the drawer during cooking. For the first problem, check the element with a torch and use a dry brush on any remaining dark spots. For the second, add a tablespoon of water to the drawer before cooking fatty foods — it creates steam that catches dripping fat before it can smoke and burn against the base.
What household items can I use to clean my air fryer?
Everything you need is already in your kitchen. Baking soda for baked-on grease, white vinegar for odours and light grime, standard dish soap for routine washing, lemons for steam cleaning, a soft old toothbrush for crevices and the element, kitchen roll for quick wipe-downs, and a microfibre cloth for the exterior. That combination handles every cleaning task your air fryer will ever produce — no specialist products, no expensive sprays needed.
The Bottom Line
The best air fryer cleaning hack is not a single secret technique — it is a small collection of consistent habits that take less time than eating the meal you just cooked. Wipe it warm after every use. Use baking soda paste for stubborn grease. Run the lemon steam cycle when it smells. Brush the heating element once a week. Follow those habits and you will never face a genuinely difficult cleaning job again. Your food will taste better, your machine will last longer, and the whole process stops feeling like a chore and starts feeling effortless.
—